Backup Windows using file history
File History is designed to be quick and easy to enable, unlike other complex backup tools. It is built right into Windows and is a great way to backup your Windows laptop or desktop computer. To enable it, you need to first connect an external hard drive to your computer.
Next, open the Settings app from your Start menu. Navigate to Update & Security > Backup.
Click or tap the “Add a drive” option under Back up using File History to add an external drive that File History will back up to. Here it will list your external drive and give you the option to back up to them.
You can use the Control Panel for this, but we’ll be covering the new Settings interface. If you would like to use the Control Panel instead, open the Control Panel and navigate to System and Security > File History.
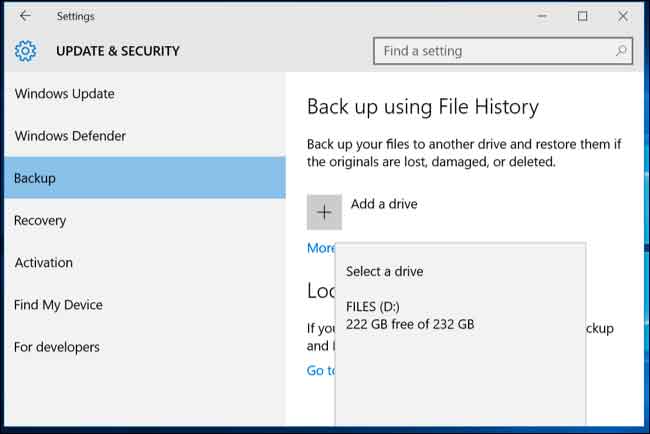
Select a drive, and Windows will use it for File History. The “Automatically back up my files” option will appear and be automatically turned on. Windows will automatically back up your files to the drive whenever you connect it to your computer.

How to Configure File History
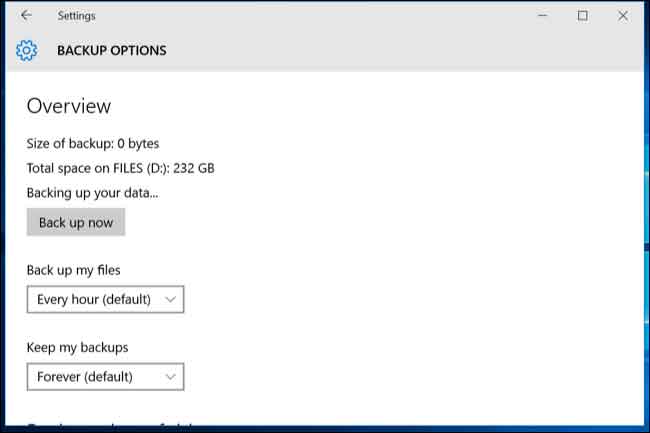
Select “More options” to configure how often File History backs up, how long it keeps those backup copies, and–most importantly–which files it backs up.
File History automatically backs up your files every hour by default, but you can select a different time here. You can choose once every 10 minutes, 15 minutes, 20 minutes, 30 minutes, 1 hour, 3 hours, 6 hours, 12 hours, or once per day.
It will normally keep your backups forever, but you can have it delete them when they become one month, 3 months, 6 months, 9 months, 1 year, or 2 years old. You can also have File History automatically delete backups as necessary to make space on your File History drive.
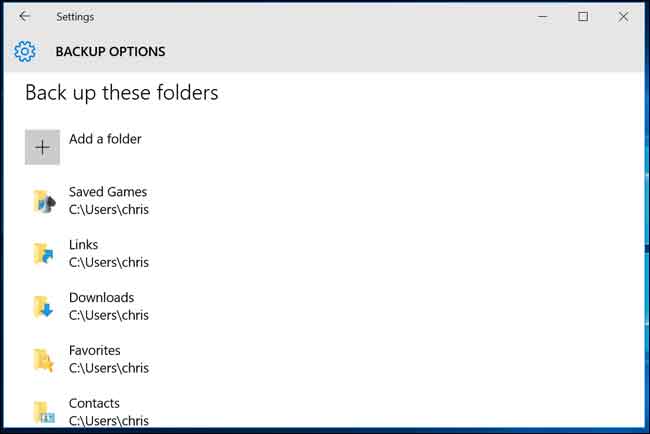
By default, File History will be set to back up back up important folders in your user account’s home folder. This includes the Desktop, Documents, Downloads, Music, Pictures, Videos folders. It also includes the Roaming folder where many programs store application data, your OneDrive folder, and other folders.
You can check the full list of folders in this window, and add more folders. Select “Add a folder” and you’ll be able to choose any folder on your computer to back up. You can also select a folder here and use the “Remove” button to prevent Windows from backing it up.
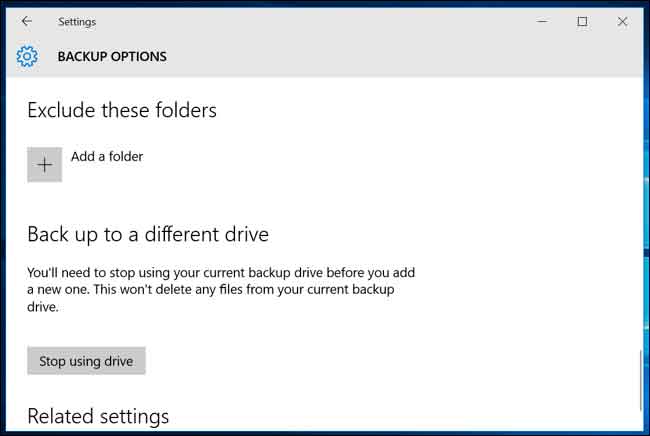
You’ll also find an “Exclude these folders” section that allows you to exclude specific subfolders from being backed up. For example, you could have Windows automatically back up every folder in your Documents folder, but ignore one particular folder.
To start backing up to a different drive, use the “Stop using drive” button. This allows you to stop backing up to your current drive and start backing up to a new one. The backups won’t be deleted, but Windows can only be configured to back up to one drive at once.